How to Replace Heat Sealer Tape
Step-by-step guide to replacing PTFE tape on impulse sealers, L-bar sealers, flow wrappers, and tray sealers
Last updated: March 2026
To replace heat sealer tape, turn off the machine and let it cool, peel off the old tape, clean the jaw surface with isopropyl alcohol, cut the new PTFE tape to size, and apply it smoothly from one end to the other using firm pressure to avoid air bubbles. The entire process takes 5–15 minutes per jaw depending on the machine type. Replacing tape before it fails — rather than after a seal failure stops the line — is the single most effective maintenance practice for any heat sealing operation.
This step-by-step guide covers tape replacement on all common heat sealing machines, including impulse sealers, L-bar sealers, flow wrappers, and tray sealers. Based on GORTEF’s experience supplying 500+ packaging lines across Australia and New Zealand, we also cover common mistakes that shorten tape life and tips for getting the longest service from each roll.
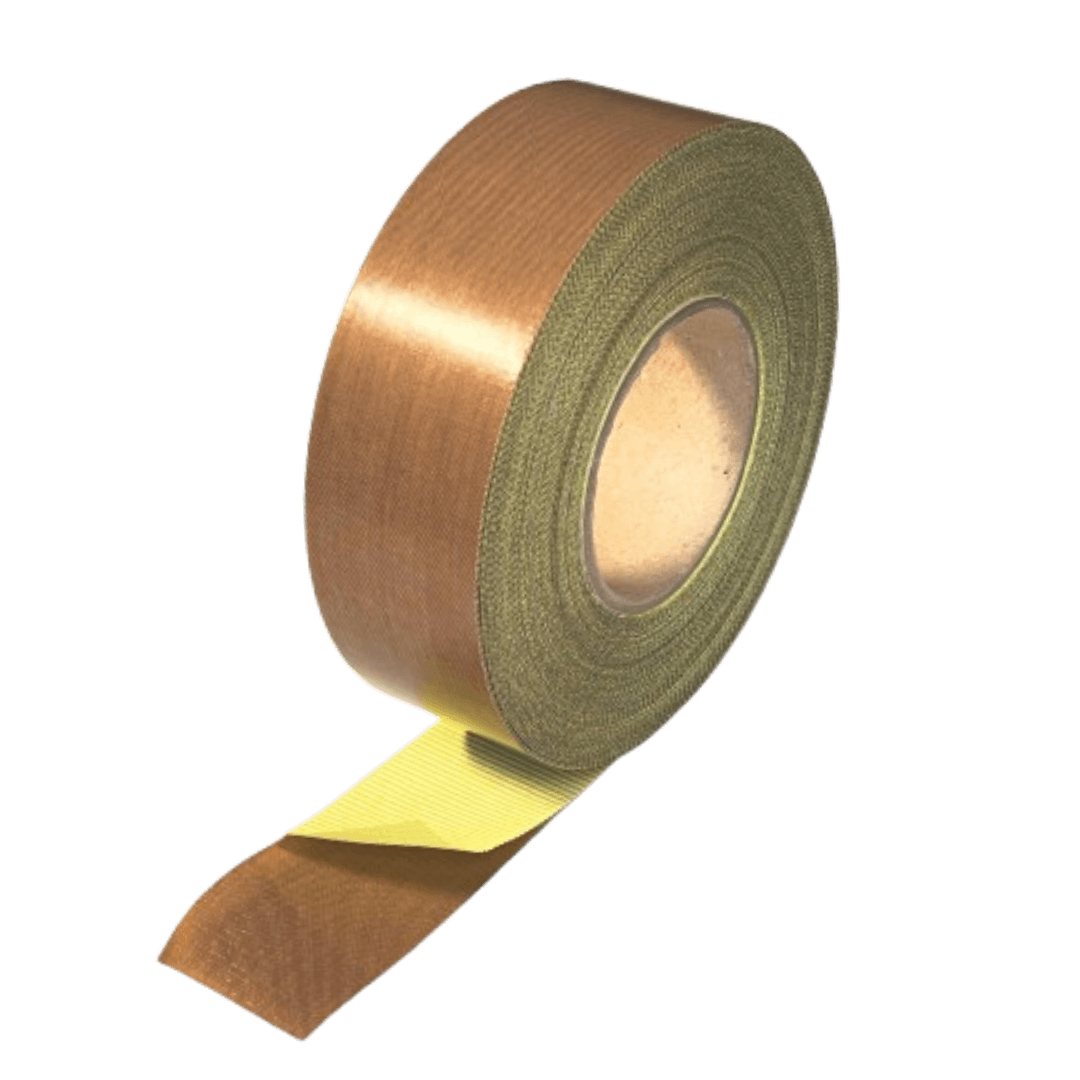
Need replacement PTFE heat sealer tape?
GORTEF supplies heat sealer tape in 3, 5 and 10 thou thicknesses, custom-cut to any width — Australian-made, rated to +260°C, shipped Australia-wide and to New Zealand. Request a quote.
When Should You Replace Heat Sealer Tape?
Do not wait for seal failures to replace tape. By the time a seal fails, the tape has already been underperforming for days, producing weaker seals that may not be visibly defective but compromise package integrity. Replace tape when you observe any of these signs:
- Discolouration — brown, yellow, or dark patches on the tape surface indicate the PTFE coating has degraded from heat exposure
- Edge lifting or peeling — if tape edges are lifting from the jaw, film residue gets underneath and contaminates seals
- Visible glass fibre — if you can see the woven glass fabric through the PTFE coating, the non-stick surface is worn through
- Film sticking to the jaw — packaging film sticking where it previously released cleanly means the PTFE surface is exhausted
- Inconsistent seal quality — uneven seals, weak spots, or variations in seal width suggest the tape is no longer distributing heat evenly
- Fraying or tearing — any physical damage to the tape should trigger immediate replacement
For replacement frequency guidelines by machine type, see our article on how often to change heat seal tape.
What You Need to Replace Heat Sealer Tape
Gather these items before starting. Having everything ready avoids unnecessary downtime:
- New PTFE tape — correct thickness and width for your machine (see GORTEF PTFE tape range)
- Isopropyl alcohol (IPA) — for cleaning the jaw surface. Use 90%+ concentration for fastest drying.
- Clean lint-free cloth — for applying IPA and wiping the jaw surface
- Sharp blade or scissors — for cutting tape to length and trimming edges
- Flat roller or squeegee (optional) — helps press out air bubbles during application. A credit card works in a pinch.
- Measuring tape (optional) — for measuring jaw width if cutting from a wider roll
How to Replace Heat Sealer Tape: Step by Step
Step 1: Turn Off and Cool the Machine
Switch off the heat sealer and allow the sealing jaw to cool to room temperature. Never attempt to replace tape on a hot jaw — you risk burns, and the silicone adhesive on the new tape will activate unevenly on a hot surface, creating bubbles and weak spots.
On impulse sealers, the jaw cools within a few minutes. On constant-heat sealers (band sealers, some tray sealers), allow 15–30 minutes for the jaw to cool below 50°C.
Step 2: Remove the Old Tape
Peel the old tape from one corner, pulling slowly at a low angle (almost flat against the jaw). Pulling straight up at 90° can leave more adhesive residue behind.
Tip: If the old tape is stubbornly bonded and tears during removal, warm the jaw slightly (to around 60–80°C) to soften the adhesive, then try again. Do not use metal scrapers on the jaw surface — they can scratch the metal and create grooves that trap film residue.
Step 3: Clean the Jaw Surface
This is the most important step and the one most often skipped. Adhesive residue, burnt film, and contaminants left on the jaw surface will cause the new tape to bond unevenly, leading to premature lifting and shorter tape life.
Apply isopropyl alcohol generously to a lint-free cloth and wipe the entire jaw surface until no residue remains. For stubborn adhesive, use a citrus-based adhesive remover (such as De-Solv-it or Orange Power), then follow up with IPA to remove any oily residue from the citrus cleaner.
The jaw surface should be completely clean, dry, and free of any sticky residue before applying new tape.
Step 4: Measure and Cut the New Tape
Measure the jaw length and cut the PTFE tape to size, adding 10–15 mm extra on each end for trimming. If the tape needs to be narrower than the roll width, measure the jaw width and cut a strip to match.
Tip: If you regularly replace tape, consider ordering custom-cut tape from GORTEF pre-cut to your exact jaw width. This eliminates measuring and cutting on the factory floor and ensures consistent tape placement every time.
Step 5: Apply the New Tape
Peel back approximately 30–50 mm of the release liner from one end. Align the exposed adhesive edge with one end of the jaw and press firmly into place.
Gradually peel the liner while pressing the tape onto the jaw surface, working from one end to the other. Use a flat roller, squeegee, or the flat of your hand to press firmly and push out any air bubbles as you go.
Key rules for application:
- Apply firm, even pressure — light pressure traps air bubbles that cause hot spots
- Do not stretch the tape — stretching thins the PTFE coating and causes premature wear
- Keep the tape aligned — if it drifts off-centre, peel back and reposition rather than leaving a crooked application
- Overlap strips by at least 5 mm if using multiple strips on a wide surface
Step 6: Trim the Edges
Once the tape is fully applied, trim any overhang with a sharp blade. Ensure all edges are firmly pressed down — lifted edges catch on packaging film and peel back during operation. Run a fingernail or roller along all edges to seal them.
Step 7: Heat Cure (Recommended)
Close the heat sealer at normal operating temperature and hold for 30–60 seconds. This heat cure activates the silicone adhesive for maximum bond strength and ensures the tape conforms fully to the jaw surface. After curing, inspect the tape for any bubbles or lifted edges and press them down if needed.
Machine-Specific Replacement Tips
Impulse Sealers
Tape covers the heating element pad on both upper and lower jaws. When replacing, do both jaws at the same time — if one jaw is worn, the other is usually close behind. Use 3 or 5 thou tape (TCG003AD or TCG005AD). For machines with exposed nichrome wire, consider zone tapes which have a non-adhesive centre strip over the wire area for cleaner seals.
L-Bar Sealers
The L-shaped sealing wire requires tape cut to follow the L-profile. Cut two strips (one for each arm of the L) and overlap at the corner by 5–10 mm. Zone tape (TZT005AD) is strongly recommended for L-bar sealers to prevent seal marks from the adhesive layer.
Flow Wrappers
Cross-seal jaws and fin-seal bars on flow wrappers run at high cycle rates (60–200+ cycles per minute). Use 3 thou (TCG003AD) for maximum heat transfer. Replace more frequently than lower-cycle machines — typically every 1–2 weeks. The jaw is usually accessible by removing a guard or opening a service panel.
Tray Sealers (MAP)
The sealing plate on a tray sealer is larger than most jaw surfaces. You may need to apply tape in overlapping strips. Use 5 or 10 thou (TCG005AD or TCG010AD) for the longer service life needed on these lower-cycle machines. Ensure the tape covers the full sealing area including any gasket contact zones.
Common Mistakes That Shorten Tape Life
Avoid these errors that cause premature tape failure and increased replacement costs:
| Mistake | Why It Shortens Tape Life | Fix |
|---|---|---|
| Not cleaning the jaw before applying new tape | Residue prevents adhesive bonding, causing early lifting | Always clean with IPA until residue-free |
| Applying tape to a hot jaw | Adhesive activates unevenly, trapping air bubbles | Let jaw cool to room temperature first |
| Stretching the tape during application | Thins the PTFE coating, creating weak spots that wear through first | Apply without tension, let tape lay flat |
| Using the wrong thickness | Too thin wears out fast; too thick impedes heat transfer | 5 thou for general use, 3 thou for high-speed, 10 thou for heavy wear |
| Running the sealer above rated temperature | PTFE degrades faster above 260°C | Keep operating temperature within the recommended range for your film |
| Using cheap tape with acrylic adhesive | Acrylic adhesive fails above 150°C, tape slides off the jaw | Always use silicone adhesive-backed tape rated to +260°C |
Summary
Replacing heat sealer tape is a simple 7-step process: power off, remove old tape, clean the jaw with IPA, measure and cut new tape, apply from one end with firm pressure, trim edges, and heat cure. The most important step is cleaning the jaw — skipping it is the leading cause of premature tape failure. Replace proactively based on visual inspection rather than waiting for seal failures, and keep spare tape in stock to avoid unplanned downtime. GORTEF supplies PTFE heat seal tape in 3, 5, and 10 thou across Australia and New Zealand with custom cutting to any width.
Frequently Asked Questions
Replacing tape on a single heat sealer jaw typically takes 5–15 minutes including cleaning. Impulse sealers with small jaws are fastest (5 minutes). Larger machines like tray sealers with wide sealing plates may take 10–15 minutes. The longest part is usually waiting for the machine to cool down.
No. Always remove old tape completely and clean the jaw surface before applying new tape. Layering tape creates uneven heat distribution, traps contaminants between layers, and results in poor adhesive bonding that causes the new tape to lift prematurely.
Bubbles are caused by applying tape to a hot surface, not pressing firmly enough during application, or residual moisture/contaminants on the jaw. Ensure the jaw is cool, clean, and dry. Use a roller or squeegee to press out air during application. A heat cure (30–60 seconds at operating temperature) after application also helps.
Use isopropyl alcohol (IPA) at 90%+ concentration with a lint-free cloth. For stubborn adhesive residue, use a citrus-based adhesive remover first, then follow up with IPA. Do not use metal scrapers or abrasive cleaners that can scratch the jaw surface.
Yes, especially on impulse sealers where both the upper and lower jaw have PTFE tape. If one jaw's tape is worn enough to replace, the other jaw is usually close behind. Replacing both at once ensures even heat distribution and consistent seal quality.
You May Also Be Interested In
- PTFE Heat Seal Tapes — Browse tapes in 3, 5, and 10 thou
- Zone Tapes — Non-adhesive centre strip for clean seals on impulse and L-bar sealers
- How Often to Change Heat Seal Tape — Replacement schedules by machine type
- Heat Seal Tape for Food Packaging — Food safety compliance and machine-specific recommendations
- What Is Teflon Tape? — Types, properties, and applications explained
- Where to Buy PTFE Tape in Australia — Sourcing guide for industrial tape
GORTEF PTFE Tapes for Heat Sealers
TCG003AD
TCG005AD
TCG010AD
Why Choose Gortef?
Australian Owned
Supplying teflon tapes, sheets and belts to local Australian and New Zealand companies since 1989
Reliable Quality
Industry-leading PTFE tapes, sheets and belts manufactured to the highest standards, trusted by 600+ small to listed Australian companies
Fully Insured
Peace of mind with comprehensive public and product liability insurance coverage
Local Fast Delivery
Local support and FAST delivery to all Australian states